Real Estate Photo Editing Skills for Home Interior Images
It is better to think of a concept on how the property will catch the prospective buyer’s attention. One may either focus on the interior or exterior setting of the property. Or at best, both!
This article will discuss the recommendable techniques when editing photos taken inside the house. Listings have the photos of the interiors of the properties to pique the interest of the potential buyers.
These real-estate photo editing skills should be handy when aiming to sell a property.
Interior Setting: Use Adobe Lightroom
Let’s start with interior setup. It is especially recommendable to use Adobe Lightroom. This program allows a large number of images to be organized, viewed and edited. This is ideal for non-destructive editing, which still holds data from the original image.
Lightroom allows to batch edit and to change the lighting and colours of the images. This is a great easy tool to search photos for some minor or simple editing.
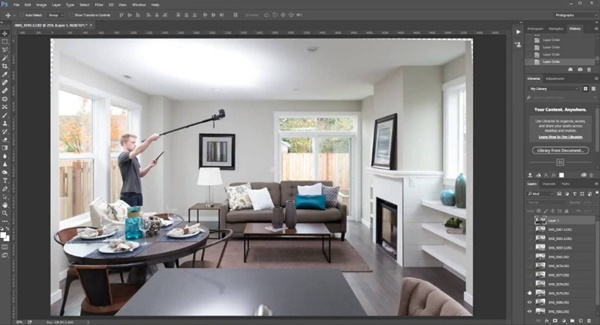
One of the simplest yet most important editing that needs to be performed on all interior images is vertical alignment. Please ensure the columns and corners of the furniture are straight and aligned properly. Then use the transform tool in adjusting the images properly.
Techniques for Interior Settings
Dark images are one of the most common problems when shooting indoors. And to resolve this, here are the following procedures and tips that will help achieve productive results. Firstly, adjust the brightness and contrast as necessary. Fine-tune the shadows in your photo a little bit of shifting and changing to the right properly. If needed, pull down slightly the highlight. This will lighten up the dark areas of the image.
Due to several light sources when capturing photos inside, correcting the white balance in the image can be done with the use of the eyedropper tool. Select the RGB percentages on the tool to be able to determine a neutral colour. For optimum result, change the tint and the temperature. Increase the temperature if the photo looks bluish. This will give the image a striking appeal.

Also, check the floors and corners in the photos as these are the areas that are most grainy. To repair this, adjust the luminance under the noise reduction module, it somehow neutralizes the grain. Also adjust the sharpness from 85-90 for best results. This will make the photo look well-defined.
Enable profile corrections for automatic adjustment in the lens correction element. If necessary, delete the colour aberration. The lens correction tool is a machine that corrects the various optical problems on most lenses. This will help make the image look more realistic at the same time remarkably.
Lastly, add some interesting lights on the image can also be done through Lightroom. Perform some dodging and burning to add some extra light by creating streaks of light. Try adjusting the exposure, flow, feather and density. Drag and brush these streaks over fixtures where natural light normally hit. This can be great for images with lighting fixtures as this creates more realistic and natural lighting. It also improves to brighten the image better.


i have started an idea on photography and discovered you blog....
ReplyDeleteits good for those who cant afford..
its Really helpful..!!
if anyone wants some professionally important tips thn you can guys click on this link....!!
Commercial Real Estate Photography
Professional Real Estate Photography
Real Estate Photographers Near Me
Best Real Estate Photography
Time Lapse Photographers
Time Lapse Photography
Time Lapse Videography
Corporate Video Production In Dubai
Professional Video Production In Dubai
Video Production Company In Dubai
Video Production In Dubai
Video Production Agency Dubai
Thanks for sharing such a wonderful article. Hope to read more such article on
ReplyDeletePhoto Editing Services USA
Photo Retouching Services USA
Real Estate Photo Retouching Services USA
Product Photo Editing Services Canada
Clipping Path Services USA
Background Removal Services USA
Skin Retouching Services USA
So nice!! I'm a real estate photographer + editor more than 10 years and I'm here to learn and share my knowledge about real estate photography . Welcome!!
ReplyDelete
ReplyDelete[url=https://beatcolor.com/blog/how-to-blend-real-estate-photos-in-photoshop/]How To Blend Real Estate Photos in Photoshop/url]
https://beatcolor.com/blog/how-to-grow-real-estate-photography-business-latest-techniques/
Delete